Showing posts with label hike. Show all posts

Tuesday, November 5, 2013

Jump into Fall

 
This post is a combination of fall-themed activities that we did over a period of a few weeks. Some were more "planned" activities, and some were more spur of the moment. I'm finding that M tends to be more interested in the activities that are less planned, which is a little more challenging for me, but it keeps me on my toes!

Let's start with an awesome fall-themed playdate hosted by a friend of ours. She  put together an awesome collection of fall activities for the kids to explore!


Practical Life

Raking Leaves

This wasn't a planned activity, but I have found that most practical life activities are better if they are, well, practical life? When we arrived at our friend's house, she and her husband and kids were outside trying to get her car started (it seems that a curious little boy, we won't name any names, was playing with the lights in the back of the car...). Anyway, while they were busy with the car, I grabbed a rake and started raking a pile of leaves for the kids to play in.  They decided to take over, and traded off with the rake and the vacuum to make a big pile to jump in!


Building a Fence

This activity just required a few farm animal figures and some popsicle sticks. I demonstrated how M could stack the popsicle sticks in piles or stagger them to make a fence around the cow. I didn't get a picture of her completed fence before she knocked it down, but this was a quick and easy activity.


Sensorial

Apple Prints

Prints are so much fun. They are great for making patterns, color mixing, creating your own stamp designs, and more. Apple prints are especially fun because you can cut the apple right down the middle so it has a star-shaped cut out! We went to an event at the Children's Museum a few weeks ago and they told the story of "The Little Red House with No Doors, No Windows, and a Star Inside" (find a version of the story here).


Fall Sensory Bin

This sensory bin had a base of oatmeal, and was filled with silk leaves, real and decorative acorns, and small pumpkin table decorations. The kids loved picking up handfuls of the oatmeal and watching it fall back into the bin, and you can see M collecting as many pumpkins as she could find.


Flavored Finger Paint

This activity was a HUGE hit with all of the kids! The "finger paint" was made from whipped cream that was colored with food coloring and flavored/scented with fall spices (cinnamon, nutmeg, etc). It cracked me up watching how the different kids approached this activity. M doesn't really like to get very messy, so she started by dipping the paintbrush into the "paint" and brushing it onto her paper. The boys jumped right in with their hands, squished it in their fingers, and rubbed big handfuls all over the paper. I encouraged M to smell it, and she asked if she could taste it too (I think the boys may have already been eating it at this point). It was definitely a full on sensorial experience!


Mathematics

Counting Candy Corn

A cute pumpkin place mat with numbers was used to help guide the kids as they counted out different numbers of candy corn.

Patterns

This wasn't a planned activity, but there were several containers of glue and a few glue sticks out on the table to make fall wreaths. M wasn't really all that interested in making a wreath, but she did want to arrange the bottles of glue into different patterns - haha!


In addition to the activities above, I kept my eyes open for some local fall festivals and other local events. We are lucky to have an amazing blogger in our area who keeps track of all of the upcoming events for kids! Check out this list of "Best Greenville Fall Activities" on Kidding Around Greenville (this is also where we found most of the Halloween events that we attended - see the post here). We went to Fall for Greenville (check out M's photographs from the event), the GHS Family YMCA Fall Festival, and over to Paris Mountain State Park to explore leaves and fall scenery.

Fall Festivals

Hay rides, campfires, carnival games, rides, music, and lots of great food! We had a blast at this year's local fall festivals!


Fall Scenery and Textures

A yummy picnic, nature crayon rubbings, climbing on the playground, and lots of colorful leaves - makes for the perfect fall afternoon.


Not everything we do works out at planned, but I can definitely say without a doubt that we are both learning a lot this fall!

Friday, September 6, 2013

Princess Week: Toddler Friendly Stained Glass


When I think of princesses (and royalty in general), I think of castles, jewels, and elaborate architecture and furnishings. I wanted to find an easy way for M to recreate some of that majesty, so I decided that we would make some toddler-friendly stained glass.

I started with stained glass templates that I printed from here (turtle) and here (medieval patterns). The directions on this site described how to use colored glue to trace the lines on a pattern and then paint with watercolors. M doesn't have the dexterity to trace lines with glue, and I didn't feel like doing it myself, so I came up with a better (read: easier) plan.


I cut a piece of clear contact paper that was the same size as the printed pattern. I then traced the pattern onto the non-sticky side of the contact paper with a sharpie. I peeled off the backing to expose the sticky side, and taped the contact paper sticky side up on M's table.

I then gave M several sheets of tissue paper in various colors. I happened to have some tissue paper with glitter - bonus! M tore off small pieces of tissue paper and stuck it to the contact paper to complete her design. I cut around the outline of the template when she was done, and we were left with a super easy faux stained glass design to hang on the window!


I designed a stained glass castle, and M had a meltdown because she decided that she really wanted to do a castle too (I think she probably could have used a nap at this point...). I made a second castle (it literally took about 2 minutes to trace the design), and gave her some sequins to decorate the castle before adding the tissue paper. She was overtired at this point, so I ripped larger pieces of tissue paper to get her through the castle faster.


I preferred the look of the "glass" made with smaller pieces of tissue paper, but I did like that the overlapping of the larger pieces gave us the opportunity to talk about color mixing. I think it would be neat to make a kind of color wheel with tissue paper on contact paper to show how primary colors mix to make secondary colors. I'll have to keep that idea in mind for another time....


Here are a few pictures to show what we earlier that day:


Meetup with Friends:
We are members of a few different meetup and local Facebook groups, and I love how easy it is to find people to hang out with! It seems like there is always something going on (in fact, many times I have to choose between events happening simultaneously). What was that about unsocialized homeschool kids again?


M and two other friends played on a small playground, then we went on a short hike, and wrapped up with a picnic lunch.

Mini Hike with Sticky Bracelets
One of the other moms brought a roll of painter's tape to make sticky bracelets for the hike. She made quick bracelets for everyone with the sticky side out, and the kids had a blast collecting things in the woods to stick to their bracelets (and ours!). M had quite the collections of flowers and leaves by the time we returned!


Disclaimer: All Amazon links are Affiliate links.

To see what we did for the rest of the day, click here.
Check out the rest of our Princess Week activities!


Linking Up With:
TGIF Linky Party
For the Kids Friday
Homeschool Creations Preschool and Kindergarten Community
Show and Share Saturday Link Up

Wednesday, June 26, 2013

Water Week Update #2

Tuesday

Lake Placid Trail Hike

This morning we headed over to the State Park near our house for a "hike" around the lake. We love this park because it is mostly shaded and has fairly short loop trails. We met up with several friends to walk around the lake. I love taking M out to actual parks (as opposed to playgrounds or more manicured parks) because there are so many learning opportunities in nature. For instance, check out this crazy insect we found on the water fountain as we were getting ready to start (which turns out to be a male stag beetle)!
We also watched the ducks and geese swim around the pond (and follow us hoping for a snack), found a centipede, several butterflies, an inch worm, spiders, and lots of mushrooms. We talked about how this lake was man-made, and had a dam at one side to control the water levels. She loved watching the water flow over the back side of the dam. We had a great time, and we even had an impromptu learning session about things that sink and float when she decided to throw rocks, sticks and leaves into the water.


 Sink or Float?

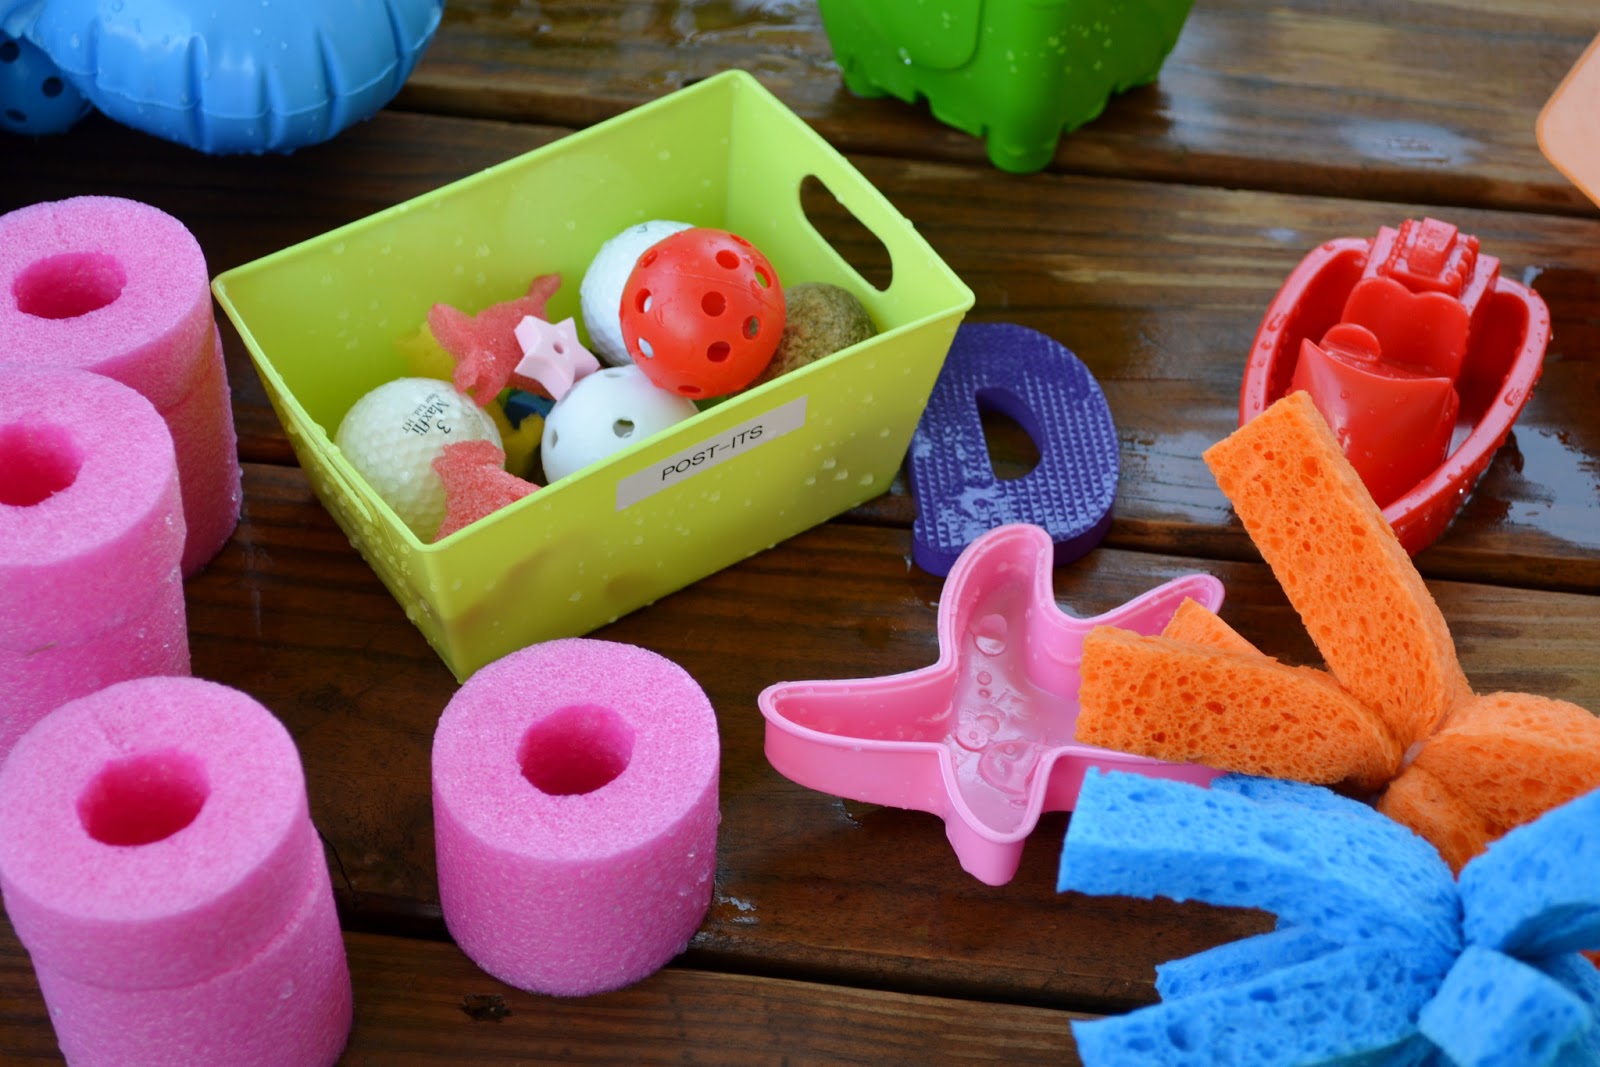
M had so much fun throwing things in the water at the lake, so I decided to fill up her baby pool and give her several toys to play with.


On Sunday we had cut up one of the large pool noodles into several pieces. M is really interested in measuring things lately, so I let her help me use the tape measure to figure out how big to cut the pieces.


I marked the measurements (I made several 1-inch and 2-inch pieces, a couple of 3-inch pieces, and left one long 24-inch piece) and cut them with a serrated kitchen knife.


We took all of the toys out to the pool (I set it up on the porch so we would be in the shade). The idea was to give M two toys at a time, one that would sink and one that would float, and see if she could guess which was which. She wasn't interested in that game, so I just went with it and watched her throw all of the items into the pool together.


We had a mini music lesson when she realized she could use the straws as drum sticks. She moved from item to item to see what made the best drum sound.


I showed her how she could use some of the containers as boats to fill them with objects that would normally sink. She thought it was fun to fill the "boats" with water until they sank.


Ice Painting

When she got tired of the pool, I brought out the paint ice cubes we made on Sunday. We made these last summer and she really enjoyed them, so I was excited to try them again. Last time I didn't put popsicle sticks in them and M's hands were cold and messy by the end, so I made sure to add them this time. I have seen the directions for this activity on several blogs. Some use paint to color the ice, others use food coloring or even Kool-Aid. We decided to try some with paint and some with food coloring to decide which we liked better.

  • Assemble your materials: ice cube tray, water, washable paint and/or food coloring, popsicle sticks, scissors (I cut each popsicle stick in half to make shorter "handles" for the paints)
  • Fill the ice cube tray with water, then add a small amount of paint or food coloring and mix until it is evenly distributed.
  • Place the ice cube tray in the freezer for about 30 minutes, then add half a popsicle stick for each color.
I used masking tape to secure a large coloring book page and a couple of collage boards to the ground. I asked M to put the ice paints back in the tray when she was finished with each one, but we made a pretty big mess anyway. The good news - everything cleaned up really easily with a quick spray of the hose.


M loved the bright colors, and had a lot of fun mixing the paints. It was very hot outside, so the paints were melting, but that actually made it easier to paint (and we got to talk about melting!). We liked the paints made with food coloring better than the actual paint - I think the food coloring stayed dissolved better in the water.

We definitely should have ended the afternoon with this activity, but I was feeling ambitious, so we tried to tackle one more...

Chalk Paint

I found directions to make sidewalk chalk paint, and since M loves chalk and paint, I thought this would be the perfect activity for her! We took the opportunity to practice measuring again - she loves to measure! We mixed 1/3 cup of cornstarch with some food coloring (neon pink and blue), and then added 1/3 cup of water. It was a little hard to mix, but it came out well. I should have gotten the foam brushes out, but the regular paintbrushes were more accessible, so we went with those instead. As I said, M was really done at this point, and she decided to paint her foot and leg instead of the ground. When I realized the food coloring was staining her skin, we pulled out the hose and packed it up for the day. M was very helpful with hosing everything down - again, this was very easy to clean up (everything except her skin, that is).


We cleaned up, went inside, and wrapped up the day by watching The Little Mermaid. M fell asleep on the couch until it was time for dinner.