Showing posts with label chalk. Show all posts

Tuesday, August 27, 2013

This Post is Brought to You by the Letter B


What's on Our Shelves?

This is Part 2 of our activities for the week. We are doing a combo Bones / Letter B unit. We spent about two weeks talking about dinosaurs and fossils (which obviously included some discussion of bones), and I didn't know if I could find enough bones activities at M's level for the whole week... plus I just got our new set of sandpaper letters and really wanted to start using them!


I have been trying to limit the number of activities I plan and create - first to not overwhelm M, and second because I don't want to burn out myself. I decided that I would plan one "theme" activity for each of the Montessori "subject" areas (Practical Life, Sensorial, Language, Math), and have one or two additional "generic" activities available to rotate in for each of the areas (like color tablets, sound cylinders, number/counting games, etc.).

As we get into our new "rhythm," we are doing a simple "Circle Time" activity after breakfast where we look at the calendar (talk about the month, date, day of the week, etc.), talk about the weather and any plans for the day or upcoming holidays, and pull out a few items from the Mystery Bag related to the week's theme.

M looking at pictures of bones and holding a dog bone

Practical Life


Pouring Beans

I bought several bags of different types of dried beans for this week's sensory bin, so I decided that it would be easy to use the beans for multiple different activities. I put out a cup filled with dried beans next to an empty cup. M can practice pouring the beans back and forth between the cups. I plan to add different spoons and tweezers later in the week to increase the difficulty.


It also led to an impromptu Practical Life activity - cleaning spilled beans off the floor!


Sensorial


Sorting Beans

Again, I already had the beans, so why not use them? I put five different types of dried beans into a cup, and we discussed the similarities and differences (size, color, shape).


She enjoyed sorting for a while, but started to get bored and was purposely putting some in the wrong compartments. I decided to switch things up, and told her to close her eyes while I put two beans in the wrong compartments. When she opened her eyes, she had to try to find the beans and move them to the correct spots as quickly as possible. That was a big hit!


Letter b Sensory Bin

I made this sensory bin with all sorts of objects that start with the letter b. I used several different kinds of dried beans as the base, as well as large handfuls of  plastic buttons and foam beads, a wooden banana, plastic bread, blocks, letter b magnets and blocks, bracelets, a bird bath toy, a small book, a bow, and a few balloons (two filled with air and two filled with water).


I put out an empty tray with the sandpaper letter b at the top. M found as many different "b" objects as she could and put them on the tray (except the pink bow - that needed to go in her hair!). She likes collecting things, so this was a fun activity for her. She also had fun searching through the bin for specific buttons (the buttons were in different shapes - circles, squares, stars, hearts, bears, and bows).


Next, she decided that birdy was hungry (his belly was empty), and she needed to cook some of the beans for him. She grabbed one of the cups from the practical life activity and scooped the beans from the bin to carry them over to her kitchen. After "cooking" them on the stove, she filled birdy's "belly" with beans. As usual, she came up with much better activities than I could ever think of!


Language


Sandpaper Letters

We just got our new set of sandpaper letters in the mail (I ordered these from Kid Advance). I was excited to start using them, but I didn't want to overwhelm M, and she hasn't shown any particular interest in writing or tracing yet. She is very interested in identifying letters, so I thought it would be a good time to focus on learning the letter sounds. I find it hysterical that every time I tell her a letter sound (this letter says "buh") she asks "Why does it say that?" - like the letter is a person and is trying to communicate with her!

Anyway, we started by pulling out several objects from the Mystery Bag - skeleton nomenclature cards, a dog bone, and a book about bones - and I told her that "bone" starts with "buh." I showed her the sandpaper letter and demonstrated how to use two fingers to trace the letter and then say the sound. I'm struggling a little with deciding which hand to use to trace the letters because M can't seem to decide if she's going to be right or left handed. She draws equally well with both hands, and doesn't seem to have any preference at all. In fact, it seems like the decision of whether to use her right or left hand is purely convenience - which hand is closer to the marker?


After we traced the letter a few times, I gave her the small salt box to practice drawing the letter. She wasn't interested, so we quickly moved on.


Chalk Rubbings

Since the sandpaper letters were not as successful as I had hoped (obviously we'll keep trying, and eventually she'll be interested), I decided to turn it into more of a sensorial activity. We put pieces of white paper over the sandpaper letter, and used the side of a piece of chalk to create a chalk rubbing that resulted in a big letter b in the middle of the paper.


I took out some small stickers and showed her how she could use the stickers to fill in the shape of the letter, but again, she wasn't particularly interested in that (she did like the chalk rubbing part).


Math

I have a few cooking activities planned for this week, but no true Montessori math activities. I am using this sequence to determine the order for presenting most of the activities we're using, and I'm starting at Period 1 to judge how M responds and whether she's ready to move on to more advanced activities in any of the areas. They don't recommend introducing any of the Montessori math works until Period 3. Almost every resource I've looked at says to focus on Practical Life and Sensorial for 3 year olds, and that's what M seems most interested in anyway (go figure).


Linking up to:

Tot School Gathering Place
Preschool Corner
Tuesday Tots
Link and Learn
Mommy Club Linky Party
Hearts for Home Blog Hop

Thursday, June 27, 2013

Water Week - Update #3

Wednesday

$1 Summer Movies

Regal movie theaters run the Summer Movie Express, which shows $1 kids movies on Tuesday and Wednesday mornings for 9 weeks during the summer. You can find more details here. Today's movie was Alvin and the Chipmunks: Chipwrecked, which was very fitting for our water theme! The movie was adorable, and M loved it. She asked if she could get up and dance several times during the movie, and finally had a "dance party" during the credits. She is hysterical!

Water Experiments

 After the movie, we spent some time doing a few kitchen science activities. First, we explored oil and water. Yesterday we read in one of our library books about how ducks have a coating of oil on their feathers that keeps their feathers dry when they swim. We tested this out by mixing oil and water. We added some food coloring, and talked about why the food coloring didn't mix with the oil (because it is water based), but "exploded" and diffused throughout the water when it got through the layer of oil.


I put M in charge of pouring and adding the food coloring, so we ended up with a VERY dark blue. We dumped out half of the mixture, poured it into a bowl, and expanded the activity to talk about color mixing. M added a few drops of yellow food coloring to turn the water green! This gave us another opportunity to talk about how the food coloring mixed with the water to change its color, but didn't mix with the oil. This was  big hit.


 Next, we washed out the measuring cup and made some new green water. M poured the water into a small mason jar. We added a paper towel "bridge" from the jar with water to another empty jar. We talked about capillary action (she thought that was a pretty funny word) and guessed how long it would take for the water to "climb" up the paper towel.


NOTE: This took quite a bit longer than we guessed. Here's what it looked like after 20 minutes:


After 30 minutes:

 We checked it again at bedtime (about 9 hours later), and the water had started pooling in the second jar. I was impressed. M, not so much. Maybe we'll try it again when she's a little older.


After setting up the capillary action experiment, we moved on to talk about states of matter. We talked about the properties of solids, liquids and gases. M is only 2, so the conversation was very basic.

Solids are hard and have a definite shape (we can make ice cubes in different shapes, and when we take them out of the ice cube tray they keep that shape). Water turns into a solid when it is very cold, like when we put it in the freezer.

Liquids flow and take the shape of the container they are in. We can pour water because it is a liquid. We poured it from a jar into a measuring cup and then into a bowl, and each time the water changed shape to fill the container. When ice heats up, it melts and becomes a liquid.

Gases have no shape; they will expand to fill any container. When they aren't in a container they will rise into the air, like the steam that rises out of a pot when we are cooking. Water turns into a gas when it is heated, and we call it steam. When steam cools, it condenses and turns back into a liquid.

We heated up water in a kettle, poured it into a jar, and added food coloring. We observed how quickly the food coloring diffused throughout the water (molecules have more energy and are moving faster). We watched the steam rise, and put a bowl of ice on top of the jar to speed up the condensation. The idea was to make it "rain," but the neck of the jar wasn't wide enough, so the water just dripped down the sides of the jar. It was a little disappointing.


Our last experiment of the day was supposed to simulate how rain falls from a cloud. I found the idea here, and it looked really cute, but didn't work the way I expected it to. We made a shaving cream "cloud" on top of a glass of water. M added food coloring until it "rained" down into the cup. She was very interested in the shaving cream (we later took an entire bowl of shaving cream out to the baby pool to play and explore), but didn't really get the rain part. I'm wondering if this would work better with cotton balls somehow... maybe we'll revisit this when we get into weather.


Chalk Paint Round 2

Yesterday's attempt at chalk paint was a bit of a disaster, but I thought it was such a good idea that I wasn't willing to give up. This time I mixed the cornstarch, food coloring and water myself (while M was busy playing with a bowl of shaving cream in the pool). I added more water this time and got out the foam brushes. This was SO much better! I found that the more watery the solution was, the easier it was to paint with. The foam brushes definitely slid across the pavement much better than the regular paintbrushes too. We got out our foam hopscotch set and used the pieces as stencils to paint numbers all over the driveway. I also painted the alphabet across the driveway, and we stepped on each letter as we sang the ABC's. The only issue we had was that the watery paint was very easy to spill (see the big splash under the letter I). I'm wondering if small cans might work better, like recycled pineapple or tuna cans (and as a bonus, they would look like mini paint cans).


Wednesday, June 26, 2013

Water Week Update #2

Tuesday

Lake Placid Trail Hike

This morning we headed over to the State Park near our house for a "hike" around the lake. We love this park because it is mostly shaded and has fairly short loop trails. We met up with several friends to walk around the lake. I love taking M out to actual parks (as opposed to playgrounds or more manicured parks) because there are so many learning opportunities in nature. For instance, check out this crazy insect we found on the water fountain as we were getting ready to start (which turns out to be a male stag beetle)!
We also watched the ducks and geese swim around the pond (and follow us hoping for a snack), found a centipede, several butterflies, an inch worm, spiders, and lots of mushrooms. We talked about how this lake was man-made, and had a dam at one side to control the water levels. She loved watching the water flow over the back side of the dam. We had a great time, and we even had an impromptu learning session about things that sink and float when she decided to throw rocks, sticks and leaves into the water.


 Sink or Float?

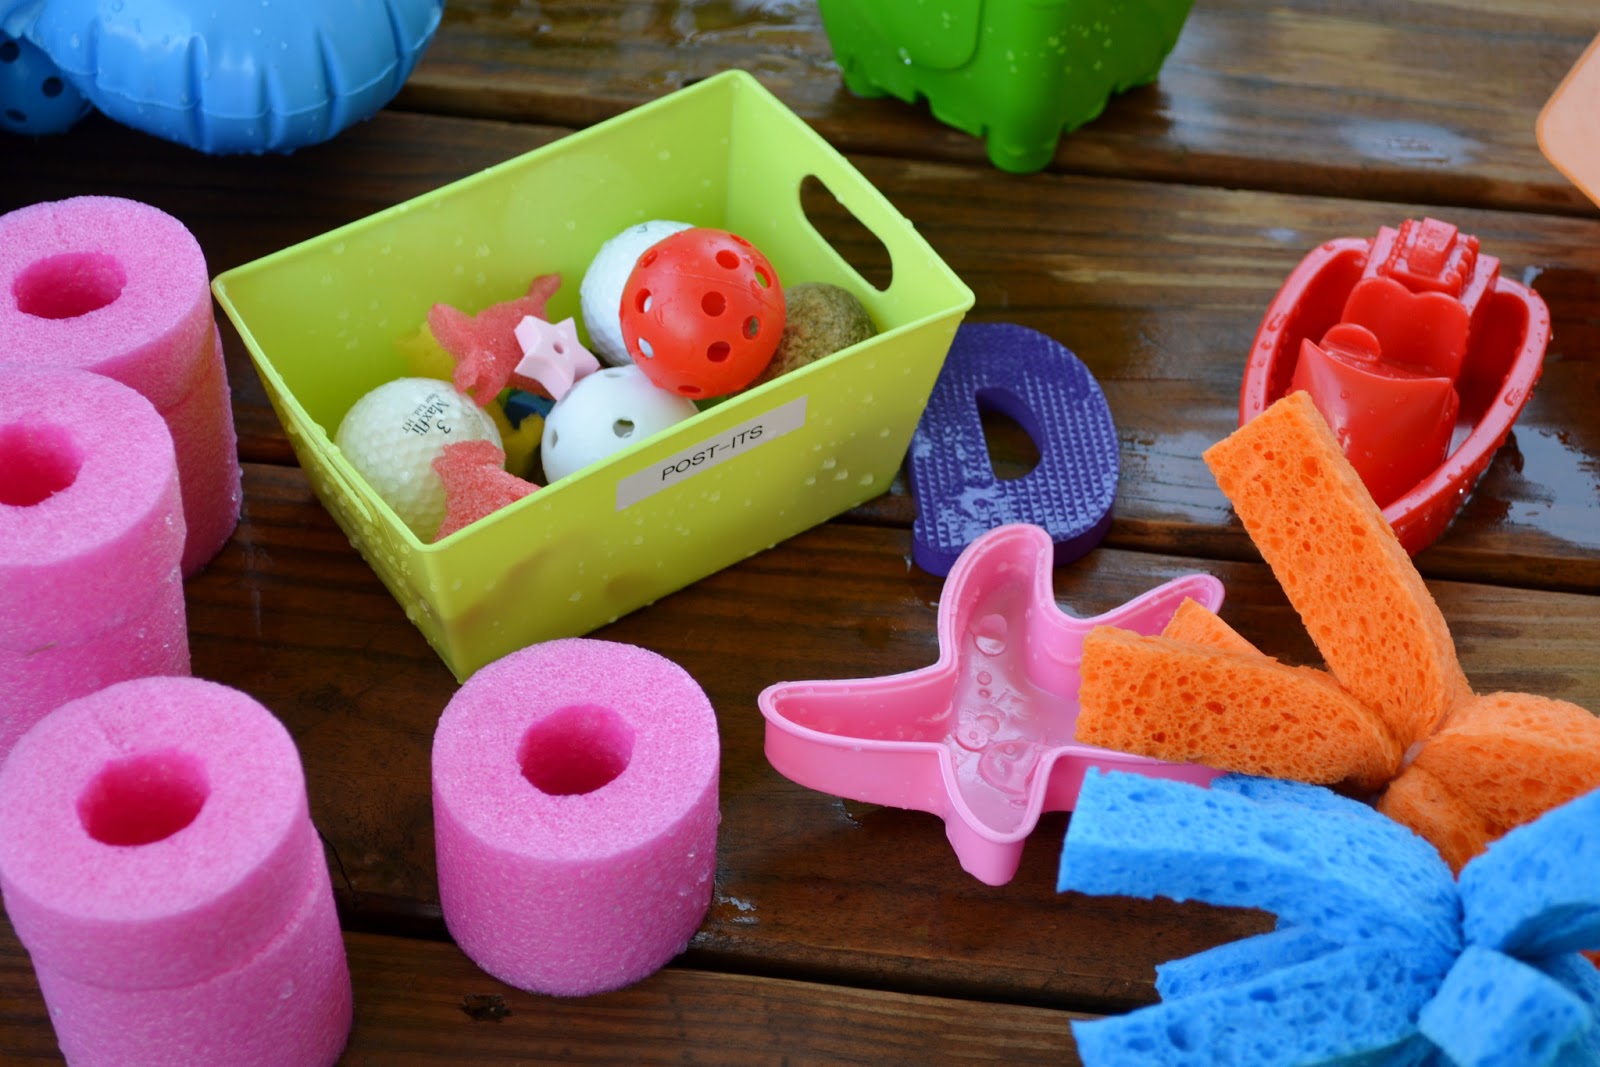
M had so much fun throwing things in the water at the lake, so I decided to fill up her baby pool and give her several toys to play with.


On Sunday we had cut up one of the large pool noodles into several pieces. M is really interested in measuring things lately, so I let her help me use the tape measure to figure out how big to cut the pieces.


I marked the measurements (I made several 1-inch and 2-inch pieces, a couple of 3-inch pieces, and left one long 24-inch piece) and cut them with a serrated kitchen knife.


We took all of the toys out to the pool (I set it up on the porch so we would be in the shade). The idea was to give M two toys at a time, one that would sink and one that would float, and see if she could guess which was which. She wasn't interested in that game, so I just went with it and watched her throw all of the items into the pool together.


We had a mini music lesson when she realized she could use the straws as drum sticks. She moved from item to item to see what made the best drum sound.


I showed her how she could use some of the containers as boats to fill them with objects that would normally sink. She thought it was fun to fill the "boats" with water until they sank.


Ice Painting

When she got tired of the pool, I brought out the paint ice cubes we made on Sunday. We made these last summer and she really enjoyed them, so I was excited to try them again. Last time I didn't put popsicle sticks in them and M's hands were cold and messy by the end, so I made sure to add them this time. I have seen the directions for this activity on several blogs. Some use paint to color the ice, others use food coloring or even Kool-Aid. We decided to try some with paint and some with food coloring to decide which we liked better.

  • Assemble your materials: ice cube tray, water, washable paint and/or food coloring, popsicle sticks, scissors (I cut each popsicle stick in half to make shorter "handles" for the paints)
  • Fill the ice cube tray with water, then add a small amount of paint or food coloring and mix until it is evenly distributed.
  • Place the ice cube tray in the freezer for about 30 minutes, then add half a popsicle stick for each color.
I used masking tape to secure a large coloring book page and a couple of collage boards to the ground. I asked M to put the ice paints back in the tray when she was finished with each one, but we made a pretty big mess anyway. The good news - everything cleaned up really easily with a quick spray of the hose.


M loved the bright colors, and had a lot of fun mixing the paints. It was very hot outside, so the paints were melting, but that actually made it easier to paint (and we got to talk about melting!). We liked the paints made with food coloring better than the actual paint - I think the food coloring stayed dissolved better in the water.

We definitely should have ended the afternoon with this activity, but I was feeling ambitious, so we tried to tackle one more...

Chalk Paint

I found directions to make sidewalk chalk paint, and since M loves chalk and paint, I thought this would be the perfect activity for her! We took the opportunity to practice measuring again - she loves to measure! We mixed 1/3 cup of cornstarch with some food coloring (neon pink and blue), and then added 1/3 cup of water. It was a little hard to mix, but it came out well. I should have gotten the foam brushes out, but the regular paintbrushes were more accessible, so we went with those instead. As I said, M was really done at this point, and she decided to paint her foot and leg instead of the ground. When I realized the food coloring was staining her skin, we pulled out the hose and packed it up for the day. M was very helpful with hosing everything down - again, this was very easy to clean up (everything except her skin, that is).


We cleaned up, went inside, and wrapped up the day by watching The Little Mermaid. M fell asleep on the couch until it was time for dinner.